

Stay up-to date on the
latest blogs. Join our
newsletter today!
This site is protected by reCAPTCHA and the Google Privacy Policy and Terms of Service apply.
How Do You Read A Graduated Cylinder? A Guide (2024)
Written by Team Ryze Chemie
12 mins read · Jun 17, 2024
Precise measurement is crucial in chemical laboratories. A slight error can lead to inaccurate results and wasted resources. Graduated cylinders are common tools, but many lab personnel struggle to read them correctly. This uncertainty can cause anxiety and affect confidence in experimental outcomes.
This article provides a step-by-step guide on how to read a graduated cylinder accurately. It covers identifying the meniscus, understanding the scale, and avoiding common mistakes.
With clear instructions and helpful visuals, you'll gain the skills to measure liquids confidently and achieve reliable results in your experiments.
Understanding Graduated Cylinders
Graduated cylinders are simple tools. But, they are very useful. They are for measuring the volume of liquids. Let's look at how they are made and the different types available.
Types of Graduated Cylinders
Glass vs. Plastic:
- Glass cylinders are preferred for most laboratory applications. They are chemically inert, meaning they won't react with most chemicals. They are also transparent and easy to clean. However, glass cylinders are more fragile and expensive than plastic cylinders.
- Plastic cylinders are lightweight, durable, and inexpensive. However, they may react with certain chemicals and are not as easy to clean as glass cylinders. They are a good choice for non-critical applications where accuracy is not paramount.
Class A and Class B:
- Class A cylinders are more accurate and precise. They meet stringent standards set by organizations like ASTM International. These cylinders are used for analytical work where high accuracy is required.
- Class B cylinders are less accurate than Class A cylinders. They are suitable for general laboratory work where high precision is not necessary.
Sizes and Graduations:
Graduated cylinders come in various sizes, ranging from 5 mL to several liters. The size and graduation of a cylinder determine its measuring capacity and precision. It is crucial to choose a cylinder with an appropriate volume range for your specific task. Using a cylinder that is too large will result in inaccurate measurements, while using a cylinder that is too small will require multiple measurements and increase the risk of error.
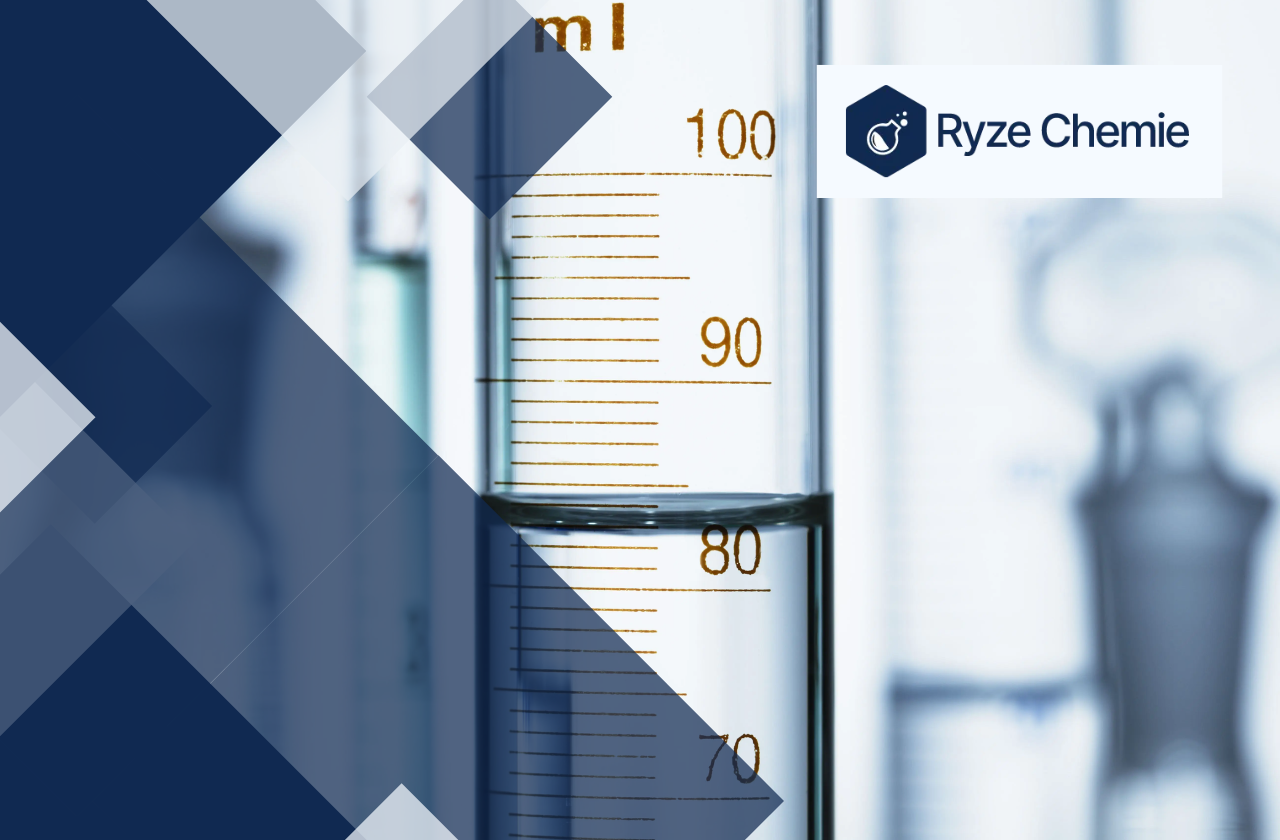
The Meniscus
What is a Meniscus?
The meniscus is the curve seen at the top of a liquid in a container. It is formed due to the surface tension of the liquid and its interaction with the container walls. The meniscus can be concave (curving downwards) or convex (curving upwards), depending on the liquid and the container material.
Reading the Meniscus:
To read the meniscus correctly, hold the graduated cylinder at eye level and view the bottom of the curve. For most liquids (except mercury), the bottom of the meniscus is where the measurement should be taken. It is important to ensure that the cylinder is placed on a level surface to avoid parallax errors.
Now that you know the basics, let's see how to use a graduated cylinder step by step.
Step-by-Step Guide to Reading a Graduated Cylinder
It's easy to read a graduated cylinder. But, it's important to follow the steps. This will help you get the most accurate measurements.
1) Selecting the Right Cylinder
When selecting a graduated cylinder, it is crucial to choose the correct size based on the expected volume to be measured. The size of the cylinder will depend on the specific requirements of the experiment or measurement. Generally, graduated cylinders come in various sizes, ranging from 10 mL to 1000 mL. For accurate measurements, it is essential to choose a cylinder that can accommodate the volume of the liquid being measured.
2) Preparing the Cylinder
Before using a graduated cylinder, it is essential to clean and dry it thoroughly. Any residue or moisture can affect the accuracy of the measurement. Place the cylinder on a stable, level surface to ensure that the measurements are taken accurately.
3) Filling the Cylinder
a) Pouring Technique
To minimize spills and air bubbles, follow these steps when pouring liquids into the cylinder:
- Hold the cylinder at an angle, with the mouth of the cylinder slightly above the surface of the liquid.
- Pour the liquid slowly and steadily into the cylinder, allowing it to flow smoothly down the sides.
- Continue pouring until the desired volume is reached.
b) Avoiding Parallax Error
To avoid parallax error, ensure that you read the meniscus at eye level. This means that you should position yourself directly above the cylinder, with your line of sight parallel to the surface of the liquid. This will help you to accurately read the measurement.
4) Reading the Measurement
a) Identifying Graduation Marks
To determine the value of each graduation mark on the cylinder, follow these steps:
- Identify the smallest graduation mark on the cylinder, usually marked with a small line or a dot.
- Measure the distance between the smallest graduation mark and the next mark.
- Use a ruler or caliper to measure the distance between the smallest graduation mark and the next mark.
- Divide the distance by the number of graduation marks to determine the value of each graduation mark.
b) Estimating Between Marks
To estimate the measurement to one decimal place beyond the smallest graduation, follow these steps:
- Identify the smallest graduation mark on the cylinder.
- Measure the distance between the smallest graduation mark and the next mark.
- Divide the distance by the number of graduation marks to determine the value of each graduation mark.
- Use the value of each graduation mark to estimate the measurement to one decimal place beyond the smallest graduation.
5) Recording the Data
Accurate recording of measurements is crucial in laboratory settings. Ensure that you record the measurements accurately in a lab notebook, including the date, time, and any relevant notes. This will help you to track your progress and ensure that your measurements are accurate and reliable.
These steps will help you most of the time. But, sometimes there are tricks to get even better results. Let's look at a few of those.
Advanced Tips for Reading a Graduated Cylinder for Laboratory Professionals
If you use graduated cylinders often, you can learn some extra tips. These tips will help you get the most accurate measurements possible.
Temperature Considerations:
Temperature changes the volume of liquids. Most liquids expand when they get warmer and contract when they cool down. This is especially important for liquids that evaporate easily or that are sensitive to temperature changes. Here's how to handle it:
- Note the Temperature: Always check the temperature of your liquid before you measure it. Many labs have a standard temperature (like 20°C) for volume measurements.
- Temperature Correction: If your liquid is not at the standard temperature, you may need to adjust your measurement. Your lab may have tables or formulas to help with this.
- Volatile Liquids: Be extra careful with liquids that evaporate easily (like alcohols or acetone). Measure them quickly to minimize evaporation.
Chemical Compatibility:
The material of your graduated cylinder matters. Some chemicals react with certain materials, which can affect your measurements and even be dangerous. Here's what to consider:
- Glass Cylinders: Glass is good for most chemicals. It's clear, easy to clean, and doesn't react with many substances. However, glass can break easily.
- Plastic Cylinders: Plastic is lighter and less likely to break than glass. However, some chemicals can damage plastic or be absorbed by it. Check the chemical's safety data sheet to see if plastic is compatible.
- Special Cases: Some strong acids or bases need special graduated cylinders made of materials like Teflon.
Calibration and Accuracy:
Even the best graduated cylinder can be inaccurate if it's not calibrated properly. Calibration means checking the cylinder against a known standard to ensure it's measuring correctly.
- Regular Checks: Have your graduated cylinders calibrated regularly, especially if you use them often.
- Verification: Before important measurements, you can verify your cylinder by measuring a known volume of distilled water. It should match the markings on the cylinder.
- Proper Technique: Always read the measurement at the bottom of the meniscus (the curve of the liquid's surface). Hold the cylinder at eye level for the most accurate reading.
Even with the best techniques, mistakes happen. Let's discuss some common problems and how to fix them.
Troubleshooting Common Errors While Reading the Graduated Cylinder
Everyone makes mistakes. If you know the common problems with graduated cylinders, you can fix them quickly. This keeps your work accurate and safe.
1) Parallax Error:
- What is parallax error? Parallax error happens when you look at the graduated cylinder from the wrong angle. This makes the liquid level look higher or lower than it really is.
- How to avoid it: Always read the measurement at eye level. This means your eyes should be directly in line with the meniscus (the curved top of the liquid). A helpful tip is to place the cylinder on a flat surface and crouch down until your eyes are level with the measurement you need.
- Why it matters: Even a small parallax error can lead to big mistakes in your results. By looking straight on, you get the most accurate reading.
2) Inconsistent Meniscus:
- The problem: Sometimes, the meniscus isn't a nice, even curve. This can happen if the cylinder is dirty or if the liquid has special properties.
- Solutions:
- Clean your cylinder: Wash it with soap and water, then rinse thoroughly. If the problem continues, use a specialized cleaning solution.
- Consider the liquid: Some liquids naturally stick to the sides of the cylinder. In these cases, try to read the top of the liquid as best as you can, or switch to a different type of cylinder that the liquid doesn't stick to as easily.
3) Overfilling/Underfilling:
- Overfilling: When the liquid goes above the line you want, it makes it hard to read the measurement accurately. The extra liquid can also spill and mess up your experiment.
- Underfilling: If you don't put in enough liquid, your results won't be correct either.
- How to fix it:
- Use a pipette or dropper: These tools help you add or remove small amounts of liquid at a time.
- Start over: If you're way off, it's sometimes easier to pour out the liquid and start again.
- Practice: The more you use a graduated cylinder, the better you'll get at filling it to the right level.
Safety is always important when working with chemicals. Let's review some key safety points to remember.
Safety Considerations for Reading a Graduated Cylinder
Graduated cylinders are safe to use. But, it's always good to be careful. Following these safety tips will protect you and your work.
1) Handling Chemicals Safely
- Wear Personal Protective Equipment (PPE): Always wear appropriate PPE, including safety goggles, gloves, and a lab coat, to protect yourself from chemical splashes or spills.
- Work in a Well-Ventilated Area: Ensure adequate ventilation in the laboratory to prevent the buildup of chemical fumes, which can be harmful if inhaled.
- Read Chemical Labels: Carefully read the labels of all chemicals before using them. Pay attention to hazard symbols and safety instructions.
- Use a Fume Hood: When working with volatile or hazardous chemicals, use a fume hood to contain vapors and prevent inhalation.
- Avoid Direct Contact: Avoid direct contact with chemicals. If accidental contact occurs, immediately wash the affected area with soap and water.
- Handle with Care: Hold the graduated cylinder securely to prevent spills or breakage. Use both hands if necessary, especially when handling large volumes.
2) Reading the Measurement Accurately
- Place on a Level Surface: Place the graduated cylinder on a flat, stable surface to ensure an accurate reading.
- Read at Eye Level: Read the measurement at eye level to avoid parallax errors, which occur when the measurement appears different from different angles.
- Identify the Meniscus: The meniscus is the curved surface of the liquid in the cylinder. For most liquids, read the measurement at the bottom of the meniscus. For mercury, read the measurement at the top of the meniscus.
- Estimate the Last Digit: Graduated cylinders have markings for different volumes. Estimate the last digit of the measurement by reading between the markings.
- Record the Measurement: Immediately record the measurement in your lab notebook to avoid forgetting or misreading it later.
- Repeat for Accuracy: If possible, repeat the measurement to ensure accuracy and consistency.
3) Cleaning and Disposing
- Rinse with Water: After use, rinse the graduated cylinder thoroughly with water to remove any residual chemicals.
- Wash with Soap and Water: If the cylinder contains hazardous chemicals, wash it with soap and water, then rinse again with water.
- Dry Thoroughly: Dry the cylinder completely before storing it to prevent contamination.
- Dispose of Chemicals Properly: Dispose of any leftover chemicals according to laboratory protocols. Do not pour them down the drain unless instructed to do so.
- Store Safely: Store the graduated cylinder in a safe place to prevent breakage or damage.
We hope this guide has helped you understand how to use graduated cylinders correctly and safely.
Conclusion
Reading a graduated cylinder is a simple yet crucial skill for anyone working with chemicals. The accuracy of your measurements directly impacts the success of your experiments. It's essential to handle the cylinder properly, take readings at eye level, and account for the meniscus.
With practice, you'll gain confidence and consistency in your measurements, leading to more reliable results in your chemical work. Remember, precision in measurement is the cornerstone of accurate scientific outcomes.
Latest Blogs